General Actions:
17. Approval Roles
Use the Approver Roles page to establish the roles that are going to be used in your Approval Plans. Here, you are simply creating a label that will own an Approval Task – used to determine to whom a requisition or order should be routed for approval. Users are assigned to Roles within Approval Rule Groups to determine who owns the role for any given organisational level or department. Role labels are used across all Approval Plans.

Advantages of Roles
Roles are not mandatory since an approval task can be owned by a named user in the approval plan rather than owned by a role. However, embedding a PECOS P2P user id in approval plans is not the ideal way to administer the approval process:
- Users leave organisations frequently and create an administrative burden: plans require updating each time a user leaves or changes job responsibility. If a document is routed to a user who has been deactivated the plan will fail.
- Plans that use Roles rather than users can be used across multiple organisations. If a user is named as an approver in a plan, that plan can only be used for the department for which that user is the approver.
- Multiple users can fill a Role. A document can therefore be sent to more than one user for approval at the same time and require approval by one or all of those users.
Naming Convention
A role is not displayed in the UI – but is a descriptive label used in configuring your approval process and can therefore be given any name. It can be a defined managerial level within your organisation (e.g. ‘Department Manager’ or ‘Purchasing Supervisor’) or it can be a generic label (e.g. ‘Approver 1’ or ‘IT Approver’).
Creating New Roles
To create a new Role
- Select the Approval Rules > Approver Roles tab to open the Approver Roles screen.
- Existing roles will be displayed in the Existing Roles table.
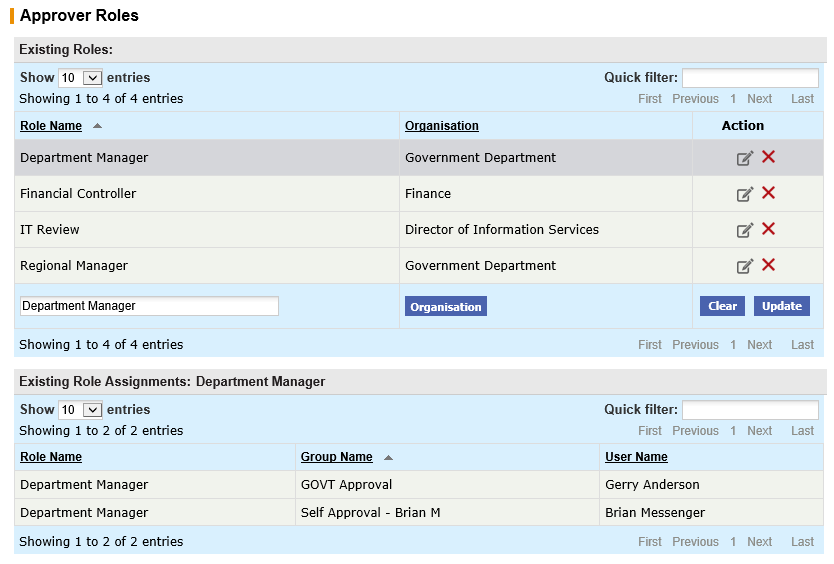
- Type a name into the Role Name field at the foot of the Existing Roles table.
- Optionally define an Organisation assignment for this role for administration purposes by clicking the Organisation button and choosing an organisation from the explorer window. If no organisation is selected the role will be saved to your administration profile default organisational level for administration access.
- Click the Add button to save the new role.
To edit the description of an existing role, click the Edit icon in the Action column. The role name will display for editing. Click the Update button to save changes.
To delete an obsolete role, click the delete icon (X) in the Action column.
Warning! Be very careful when deleting roles. DO NOT delete a role that is assigned to a plan task or the plan will become locked.
The View Users assigned to a role, click on the role name and all users who are assigned to the selected role will appear in the 'Existing Role Assignments' table at the foot of the page.
Search and Filter
The Existing Roles and Existing Role Assignments tables will display 10 entries, sorted alphabetically by default but can be extended using the Show entries control in the top left hand corner of the table. Using the list box, choose an override to display 25, 50 or 100 entries. When more than one page is available, pagination controls will display the number of pages of entries and allow you to scroll or jump between those pages. A Quick filter provides a 'type ahead' text search, which automatically filters the entries in the table using the string of characters entered.
Navigation
P2P Admin