General Actions:
11.1 Returned Requisitions
If your approver returns a requisition, you will receive an eMail notification message informing you of their action. The approver is required to provide an explanation for the rejection and their explanation will be embedded in the text of the eMail. The returned requisition can be accessed in one of two ways: through your To Do’s or the Document search screen.
To Do
- Click the To Do tab to open your tasks awaiting attention.
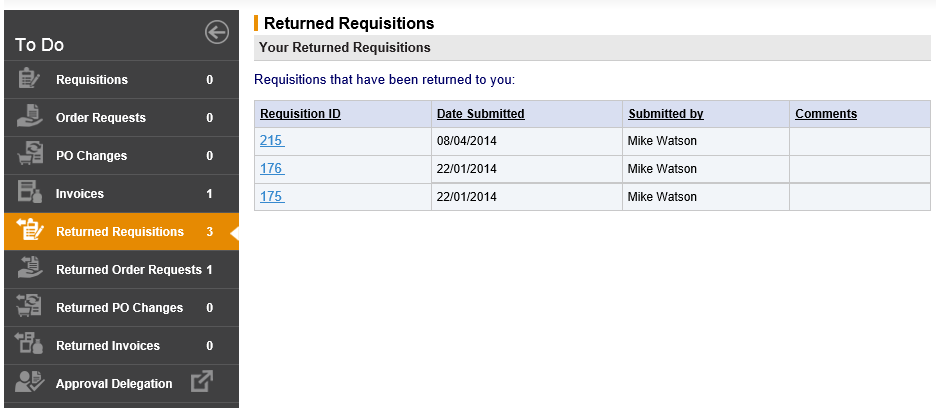
- Click on Returned Requisitions in the Left Navigation Panel to display ‘Your Returned Requisitions’.

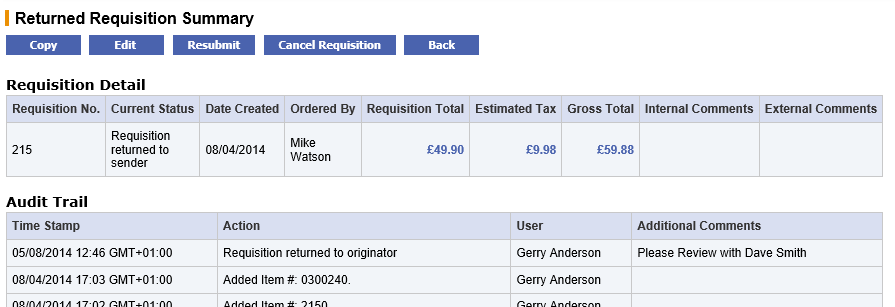
- Click on the Requisition Number for the requisition that you wish to manage. The Returned Requisition Summary screen will open.

- Choose the appropriate course of action:
- Copy - Click Copy to copy the content of this requisition into a new requisition.
- Cancel - Click Cancel Requisition to cancel this requisition.
- Edit - Click the Edit button to open the Requisition Editing screen where the following changes can be made
- Change Quantities
- Update Financial Tracking
- Update and add Comments and Attachments
- Update Delivery and Invoicing
- Delete lines
- Add catalogue items
- Add Non-catalogue items
After making your changes click the Return to Requisition Summary button. The Returned Requisition Summary screen will reopen.
- Complete your changes by clicking the Resubmit button. The edited requisition will be returned to the start of your approval plan and the audit trail will be updated with your changes.
Document Search
Returned requisitions can also be accessed through the Document screen in the normal way (see Document Search). When you receive an eMail informing you of your approver’s action, navigate to the Documents tab and search for the requisition number.
In the Search Results screen notice that the order status of the requisition is ‘Requisition returned to sender’. Click on the requisition number to open the Returned Requisition Summary screen where edit and resubmit buttons are available.
To edit and resubmit the requisition follow steps described in ‘To Do’ above.
Navigation
P2P Procurement
